Barma Sektor: Unterschied zwischen den Versionen
Aus Holopedia
Zur Navigation springenZur Suche springen| Zeile 20: | Zeile 20: | ||
poly 36 227 242 300 234 332 29 259 [[Yabol Opa Sektor|Yabol Opa Sektor]] | poly 36 227 242 300 234 332 29 259 [[Yabol Opa Sektor|Yabol Opa Sektor]] | ||
poly 31 490 224 418 246 453 41 529 [[Shelsha Sektor|Shelsha Sektor]] | poly 31 490 224 418 246 453 41 529 [[Shelsha Sektor|Shelsha Sektor]] | ||
| − | poly 429 524 477 525 458 741 410 741 [[ | + | poly 429 524 477 525 458 741 410 741 [[Baronas Sektor|Baronas Sektor]] |
</imagemap> | </imagemap> | ||
Aktuelle Version vom 31. Dezember 2020, 11:51 Uhr
< Die Galaxie < Old Colonies Cluster < Barma Sektor
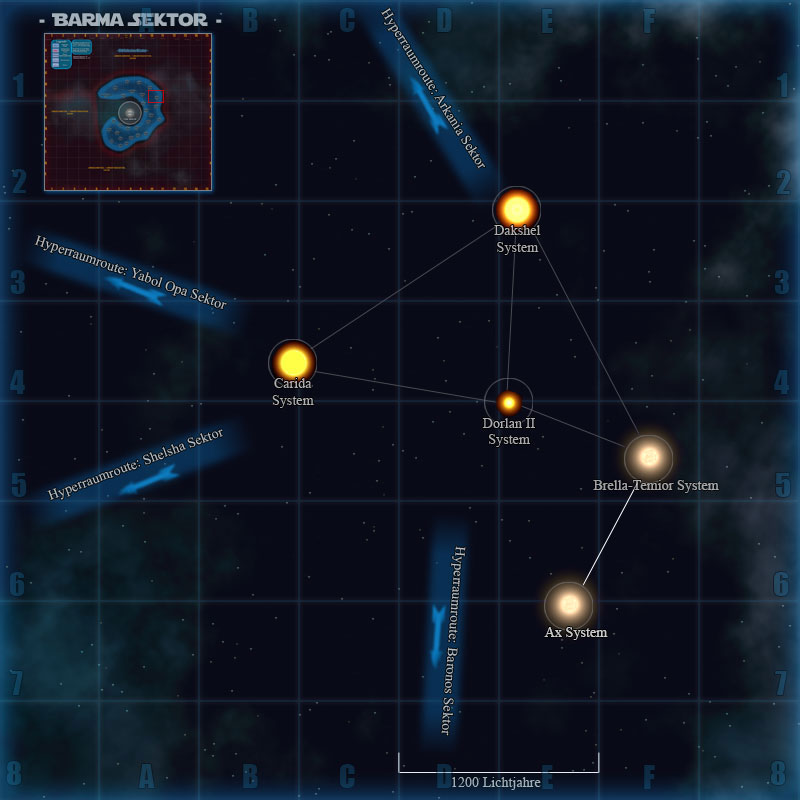
| Taktische Karte des Barma Sektors ( Die Systeme auf der Grafik können angeklickt werden ) | |||||||||||||||||||||||
| |||||||||||||||||||||||
